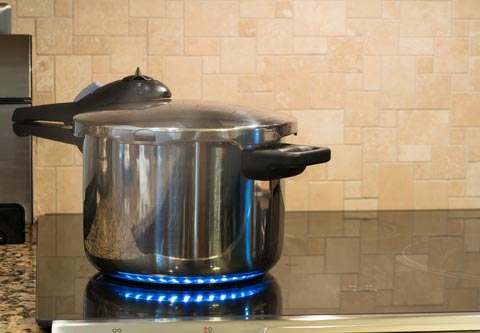
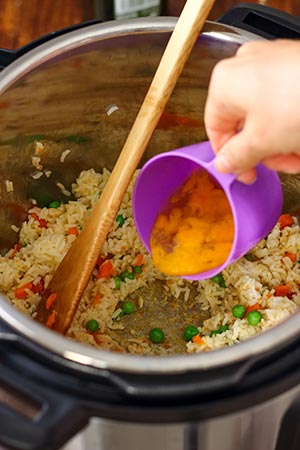
Have you ever come across a slow cooker recipe that sounds delicious and you thought, “I’d sure like to make that in my pressure cooker.”

Well, you’re in luck, a great many delicious slow cooker recipes are perfect candidates to use in your Instant pot or other pressure cooker.
The top three issues to consider are:
1. Does it have enough liquid to operate your pressure cooker?
2. Does the recipe contain ingredients that you need to cook separately or for different time frames?
3. Will you need to downsize the recipe to fit in your pressure cooker?
Let’s answer these questions and more here…
How to Convert Recipe to Pressure Cooker – Things to Check
Tip #1 – Does it have enough liquid?
Remember, pressure cookers require liquid to operate properly. Pressure cooking is basically cooking under steam pressure. In order to produce steam, you need to have enough water or some kind of liquid to produce that steam.
The amount of liquid will vary depending on your pressure cooker. With most pressure cookers, the minimum amount of liquid is between 1 and 2 cups. This can be plain water, meat-flavored stock or broth.
If the recipe you want to use calls for at least the minimum amount of liquid your cooker requires, then great, it’s probably an ideal recipe to make into a pressure cooker recipe.
If it’s a recipe that doesn’t have much liquid, but that it wouldn’t hurt it to add a little more to meet that minimum requirement, then it might still be a good candidate for your pressure cooker.
So now your recipe has passed the first requirement. Next consider the ingredients that you should avoid while cooking under pressure…
Tip #2 – Scan the ingredient list for items to omit
There are certain ingredients that just don’t do well in the pressure cooker, however, this doesn’t mean you can’t use them. You can add and simmer them in after you de-pressurize the pot.
• Dairy – You should omit dairy from the recipe, or add it at the end after the main cooking has completed. Items like milk, cheese, cream and other dairy based ingredients will curdle when cooking under pressure.
• If the recipe requires diary ingredients, avoid adding them during the pressure cooking stage. You may stir them in or melt them in afterwards, but don’t add them to the recipe while it’s being pressure cooked.
• Wine and Vinegar – These ingredients remain tart or sour under pressure. They don’t develop the same kind of flavor as being simmered on the stovetop or in a slow cooker. These too, should be omitted or added and simmered in after the pressure cooking stage.
• Thickeners – Flour or any of the starches used for thickening (corn starch, potato starch, or arrowroot starch, Guar Gum, Gelatin, etc.) should not be cooked under pressure. If you need to thicken your recipe, add it at the end after the pressure cook stage. First mix your thickener of choice with little bit of cold water, then add it to the open pot and simmer until thickened.
Tip #3 – Is Your Pressure Cooker Large Enough?
Make sure your pressure cooker is large enough to accommodate the recipe, as is. Pressure cookers usually indicate a maximum fill line that you must not exceed. Take into consideration, foods like rice, pasta, dried beans, etc.. These will absorb liquid and expand when they’re cooked. You may have to cut a large recipe down in size to fit into your pressure cooker.
Tip #4 – Does the finished recipe require a crispy skin or coating?
Are you looking to produce a crispy or fried result? This is difficult to achieve in pressure cooking.
Pressure cooking is all about cooking with steam. Steam is the vapor into which water is converted when heated. Cooking with steam will moisten and soften food, therefore, it will not typically be crispy unless you bake, broil, or grill it afterwards.
Browning the meat before hand, by sautéing in a little oil can introduce a more crispy texture and add new delicious flavors to the recipe. Before you load and pressurize the pot you may sauté the meat in the un-pressurized pot with the lid off.
Tip #5 – Are You Cooking the Right Type of Meat?
If you’re cooking meat, what kind of meat are you cooking? Are you doing expensive steaks for the family? If you have tender cuts of meat like tender-loin, T-bone, or top sirloin steaks. These kinds of expensive cuts are better cooked quickly on a fry pan, or in a broiler, or on your grill. They are not usually meant to be cooked in your pressure cooker or slow cooker.
The types of meats that are more appropriate for your pressure cooker are the tougher, less expensive meats, like chuck roasts, roast shoulder, brisket, London broil, hanger steak or flank steak. Your cooker will make these cuts very tender and juicy.
The ideal thing about these tougher cuts of meat is that not only are they less expensive than the leaner steaks, their higher fat content delivers much more flavor.
Tip #6 – Cook in Stages
If your recipe includes any combination of meats, grains such as rice, or beans, these should be cooked first and can be cooked together. What you are doing is matching ingredients that have similar cook times.
If you’re adding vegetables, they should be added in a later stage. Exceptions to this rule are chopped onions and garlic, which are added to enhance the flavor of meats, grains and beans.

Vegetables like broccoli, cauliflower, green beans, cabbage, etc. will always take much less time to cook. If you cook them together as long as the meat requires, they’ll turn to mush. You don’t want to over soften your vegetables. To maintain their color, texture and nutrients, vegetables will need to be added in a second stage of cooking.
You do this by cooking the longer cooked items first (meat, grains, beans). Then you’ll depressurize your cooker, add the vegetables, then re-pressurize and cook for a few more minutes in a second stage of pressure cooking.
This second cook-time period will depend on the type of vegetables you’re cooking. If you’re cooking green beans or broccoli, then you’ll only need a couple of extra minutes of pressurized cooking. Potatoes might need an additional 8 to 10-minutes of cook time, depending how large they are.
If you have a mix of different items, you can cut some into smaller pieces so as to match the cook-time of the other ingredients.
For a quick reference of recommended cook times, see our reference charts.
Tip #7 – Determining Cook Times
Look up the recommended cook time for each item in your recipe. If you’re combining ingredients such as meat and beans, then follow the one with the longest cook time. If there is a large difference in recommended times, then split the cooking into stages, cooking the longer items first, then add the softer items in a second stage. It’s possible to have three stages of cooking.
For a meat-based, slow-cooker recipe that requires 8-hours on low-heat, or 4-hours on high-heat, a general rule of thumb is that it can usually be done in a pressure cooker in about 25 to 30-minutes.
To reduce the amount of time it takes to pressure cook items, cut them into smaller pieces. You could do this to large roasts during the meat stage, and with large potatoes and carrots during the vegetable stage.
Tip #8 – Reduce Liquid in the recipe
In the original recipe, it may have called for certain amount of liquid to account for evaporation during the cooking process. However, in pressure cooking, the pot is sealed tightly and no excess liquid escapes.
This may or may not cause your food to be too loose. For soups and stews, this may not be that much of an issue. This might be something that you’ll have to gauge and refine as you go. If you find your food is too thin, you may wish to simmer it with the lid off to thicken it.
Tip #9 – Determining Quick Release or Natural Release
When cooking meat alone, it’s generally fine to wait for the pressure cooker to naturally depressurize after heating is over. When holding the pressure in, you’re essentially holding in the heat and still cooking the contents, even after you’ve turned the heat off.
However, when cooking in stages, to speed up the process, you may wish to move on to the next stage quickly. In any case, you can release the pressure through the venting valve, so that you can add the next ingredients, or to just stop the cooking process.
If after cooking vegetables, you should always use the quick-release method of venting the pressure, otherwise they will over cook and turn to mush.
Conclusion
This check list can be used to determine the convertibility of any recipe to an electric pressure cooker, or non-electric stovetop pressure cooker.
After trying several recipes, you’ll discover your favorites. Take notes and alter the recipes as you go and make them your own.
You may also find recipes that didn’t work as well as others. If that happens, please don’t let that discourage you. With every recipe you try, you’ll be gaining insight as to what works. With just a little experience, you’ll see how easy and fun it can be.

Leave a Reply